Elementor is a dream come true for small businesses in the services and software industries. It’s a drag-and-drop builder for WordPress that makes it super easy to design exactly what you want. That’s why 12.2% of all websites use this builder. In 2024, 10.1+ million sites were built using Elementor.
What makes it really great is how flexible it is. You can start from scratch or use one of their pre-made templates, customize everything down to the tiniest detail, and make changes in real time. It’s fast, intuitive, and, once you get the hang of it, fun to use.
In this post, we’ll share a few cool tricks and tips that can help you get even more out of Elementor – features that you maybe never paid attention to, cheat codes, and more.
1. Display elements conditionally
You can find the Display Conditions feature under the Advanced tab of any container or individual element.
Use it to determine rules for displaying various elements across your site.
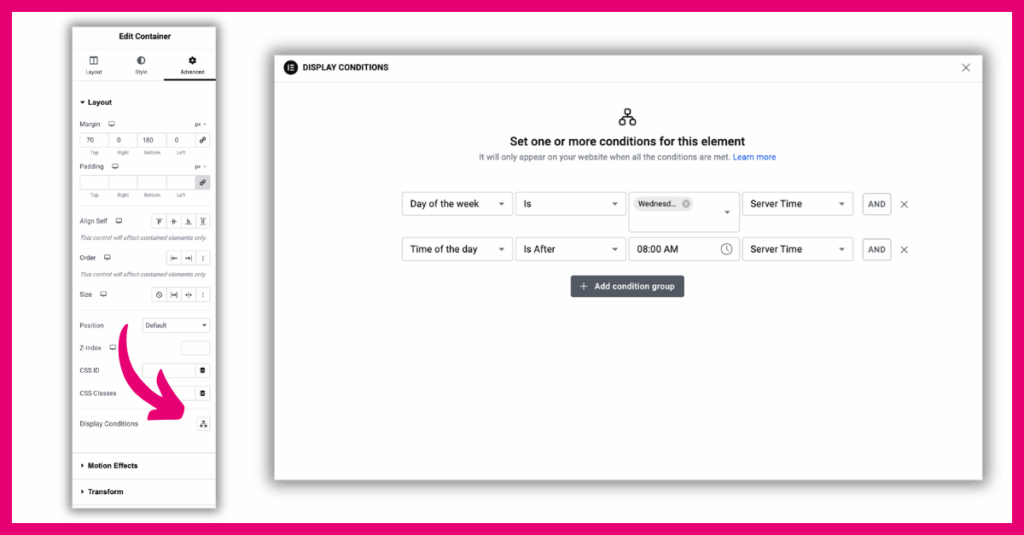
For example:
- Display a specific banner or another CTA element only for posts that are authored by a specific team member – e.g., articles published by your tech support will have a dedicated button that will take users to a knowledge hub.
- Show certain sections (like downloadable resources, private videos, or special announcements) only to logged-in clients.
- Display special offers only on certain days of the week.
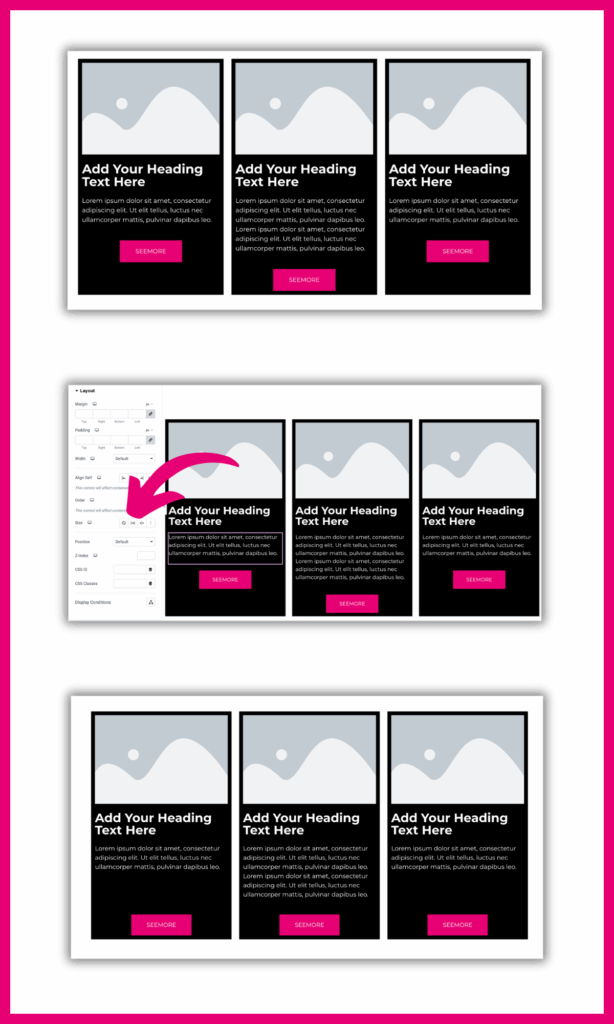
2. Align items across columns
The Grow feature for elements will help you create alignment across columns. You will find it under the Advanced tab of an element.
In the example below, we have three columns with a few basic elements: an image, a heading, a description, and a button. The description text may differ in length for each column, which results in the buttons displayed at different levels across the columns.
The easy fix is to select your text element and click the Grow icon next to Size in the Advanced tab. It will increase the space occupied by that element. Repeat the same thing (or copy/paste the style) with the text elements in other columns where the button needs alignment.
3. Frame your images and other elements in standard and custom shapes
While making images round is pretty easy by increasing the border radius in the Style tab, you have many more shape options than a good ol’ circle.
Head to the Advanced tab and locate the Mask feature. Turn it on and select one of the pre-defined shapes. If you find the selection limiting, upload your own shape.
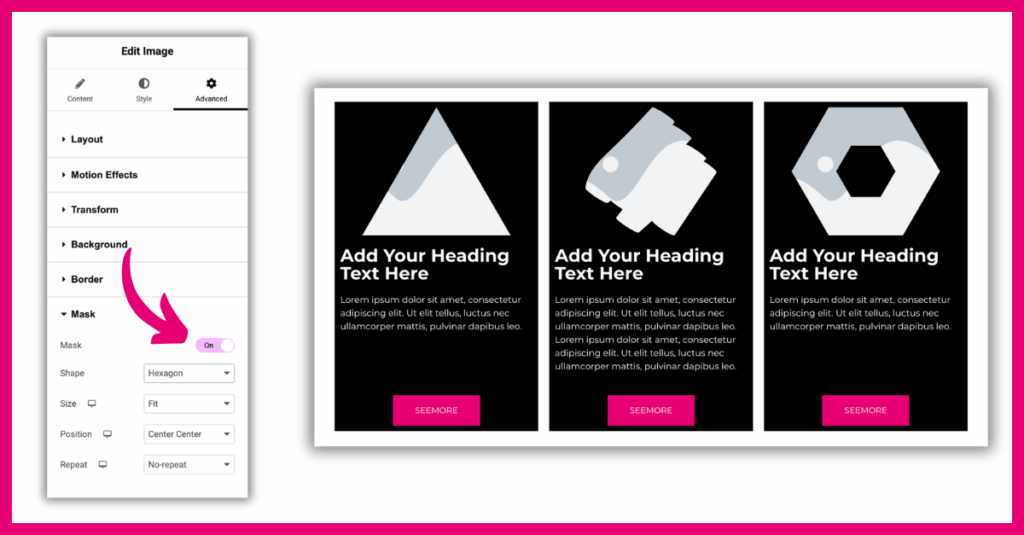
For service-based businesses, using masks can instantly elevate the visual appeal of your site – think uniquely shaped team photos, testimonial sections with wave patterns, or service blocks that stand out from typical grids.
It’s a quick way to inject personality and professionalism into your design.
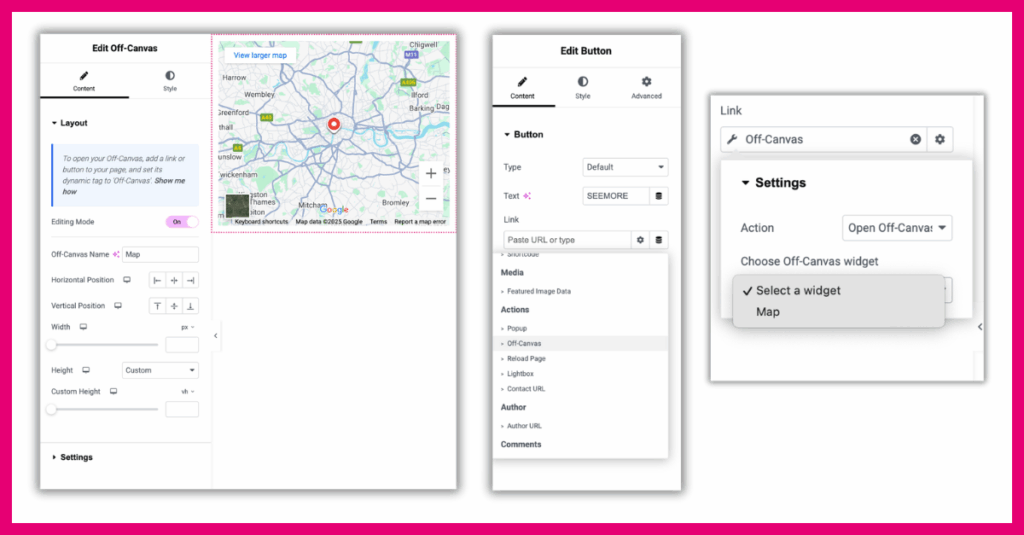
4. Keep your site clean and interactive with trigger-based slide-in panels
The Off-Canvas feature in Elementor (available in Elementor Pro) allows you to create panels that slide in from the side of the screen. It can be used to display forms, filters, or any other extra content that you don’t want to clutter the main layout.
What makes it so useful is that it helps you keep your pages clean and focused while still giving users access to extra functionality when they need it.
For example, you can use it to display a booking calendar that appears only when triggered (like a user clicking on a button).
To take advantage of that feature, first add the Off-Canvas widget from your library of elements. Design your widget with whatever content you’d like. Give the off-canvas a name and then link to it at the trigger point – e.g., your button.
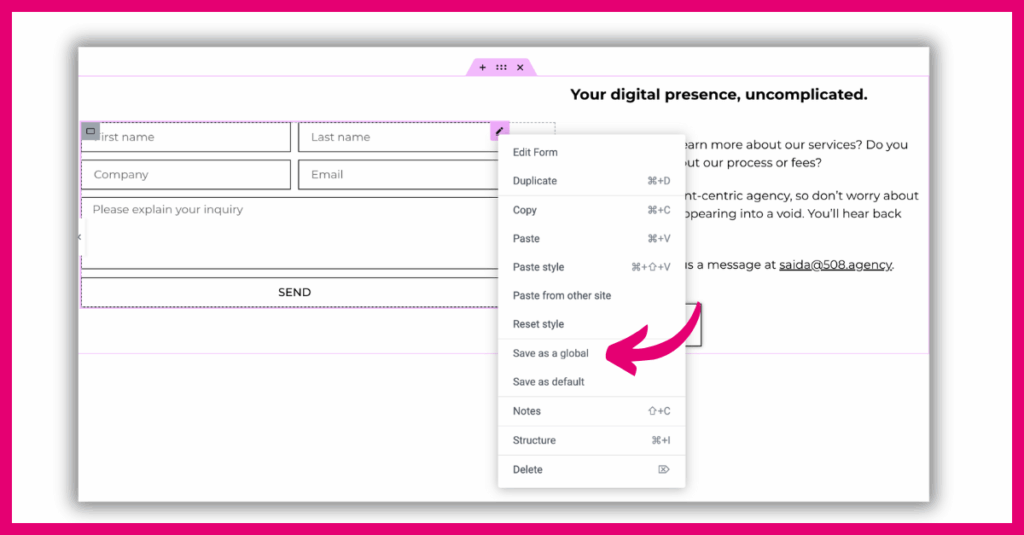
5. Easily update elements throughout the site
You probably have a number elements on your website that appear on multiple pages – a contact form, ‘Book a demo’ button, etc.
Setting elements as Global in Elementor is a huge time-saver and a consistency booster.
When you save a widget or section as Global, any changes you make to it will automatically update everywhere it’s used. This is incredibly useful for elements like CTAs, contact blocks, testimonials, or pricing tables that repeat across your site. Instead of editing each instance manually, you update it once and it syncs everywhere.
Simply right-click on the element you want to set as Global and Save as a global.
Final Thoughts
Elementor is packed with features that go far beyond basic drag-and-drop design. Once you start exploring its more advanced tools, it can really transform the way you build websites.
Whether you’re streamlining your workflow with Global widgets, keeping things clean with off-canvas panels, or making your layouts smarter with conditional displays, these “hidden” features help you build faster, look more professional, and deliver a better user experience.